Web filtering
If your school or organisation uses web filtering/blocking, it may be a good idea to manually whitelist the domains PiNet needs to access to install and build the Raspbian chroot.
- http://raspbian.org/ {Critical}
- http://raspberrypi.org {Critical}
- https://github.com {Critical}
- https://bitbucket.org {Recommended}
- http://bluej.org {Recommended}
- http://bit.ly {Highly Recommended}
- https://secure.pinet.org.uk {Recommended}
If you are unable to whitelist these domains, consider doing the initial installation on an unfiltered internet connection. It is recommended that you connect your PiNet server to an internet connection with access to these domains at least once every 3 months for updates.
Testing tool
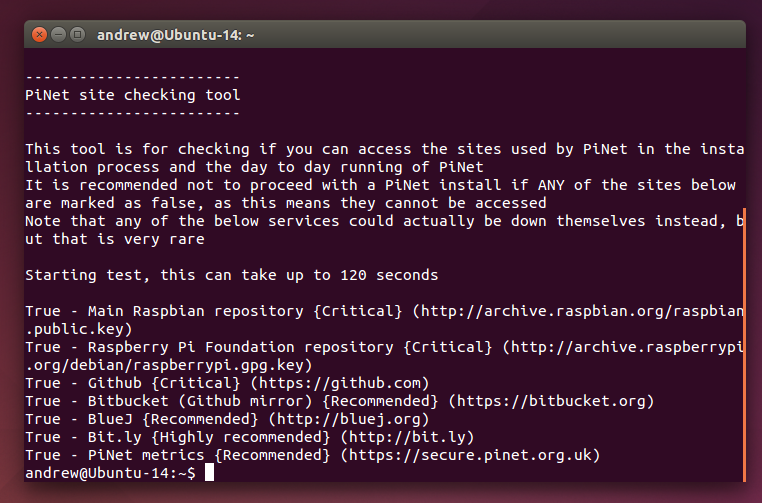
We have a simple testing tool that you can use before installing PiNet to check if any of the sites required are inaccessible.
To use it, open a terminal (on a computer running Linux, with Python 3 installed) and enter
wget https://secure.pinet.org.uk/downloads/checkInternet.py && python3 checkInternet.py
You should see an output similar to the screenshot below. If any of the sites show false beside them, then that may be an issue, especially the Critical and Highly Recommended sites.
Proxies
Many schools and organisations use proxies to route the web traffic through a filter. Although proxies are not officially supported with PiNet, it is easy to manually add them to Raspbian and Ubuntu.
Ubuntu
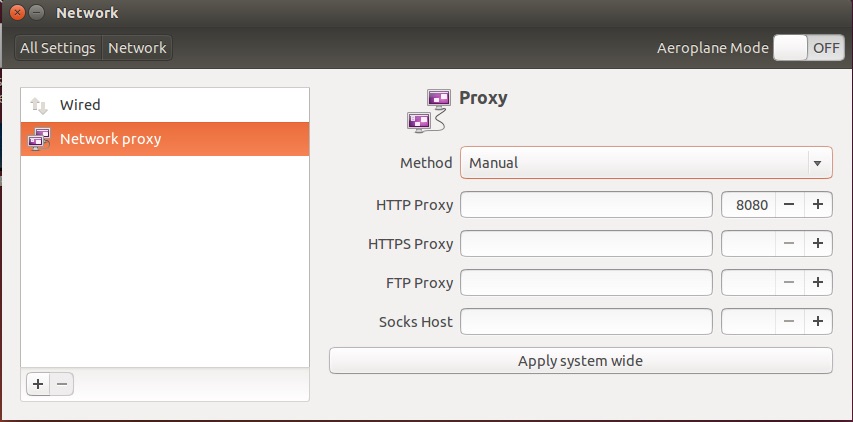
In Ubuntu, search for proxy and select Network
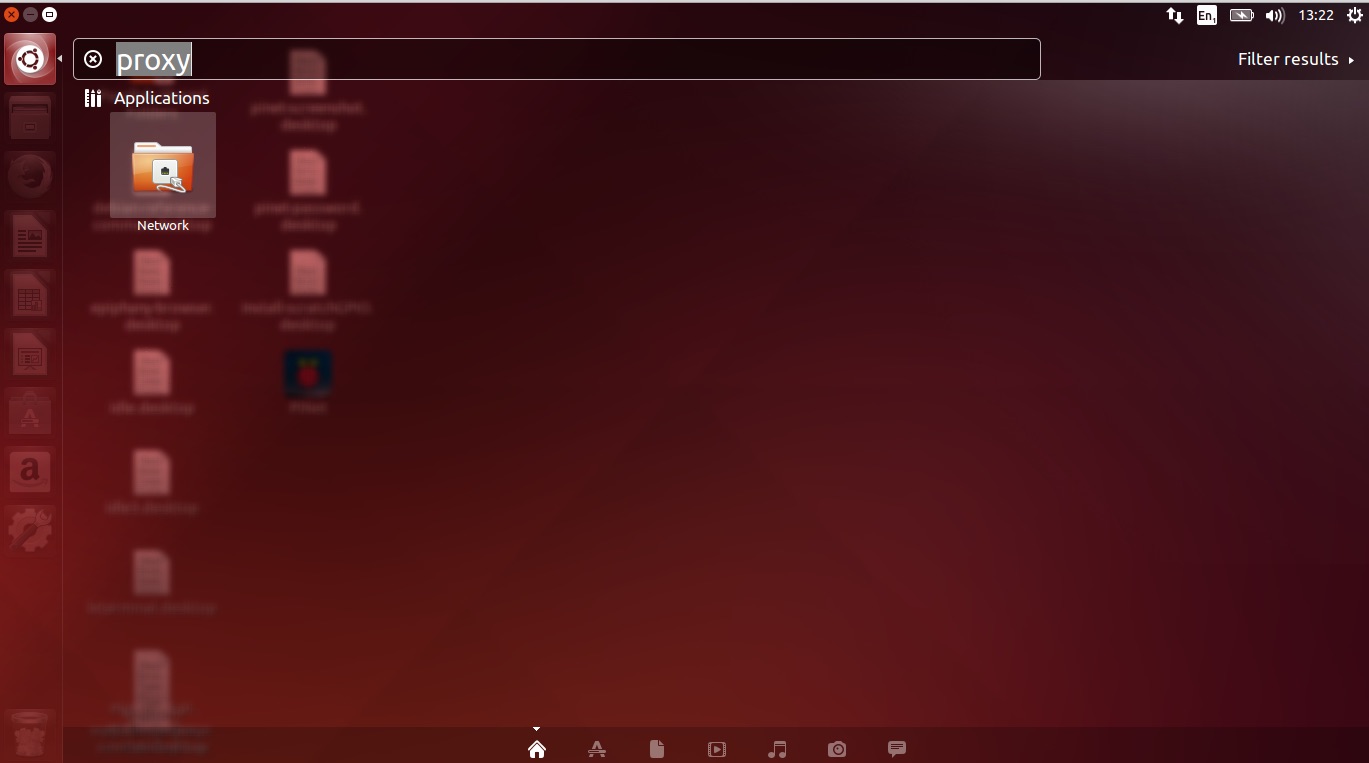
Then enter your network settings and click Apply system wide.
Raspbian
Adding proxy settings into Raspbian is a little more complicated. Make sure to read over the Editing outside guide as it includes a little more information about directly editing the Raspbian chroot.
- Open a terminal on the Ubuntu server and enter
sudo ltsp-chroot --arch armhfto enter the Raspbian chroot. - Enter
nano /etc/apt/apt.conf.d/10proxyto create a text file there and open it with the nano text editor. - Add in
Acquire::http::Proxy "http://username:password@proxy_server_address:port";where you have changed the details, for exampleAcquire::http::Proxy "http://username:[email protected]:8080";
If your proxy does not include authentication, use this insteadAcquire::http::Proxy "http://proxy_server_address:port/";.
Some applications ignore this and for those, you may need to search the web for an answer.