Copying boot files to SD card on Ubuntu
When PiNet installs, it generates a folder of SD card files ready to be dropped onto an empty SD card for your Raspberry Pi. Although this can be done on your Windows or Mac machine, it is even easier to plug in your SD card to the PiNet server. If your server does not have an SD card slot, you may want to try a USB SD card reader. There is also nothing stopping you copying the files onto a USB stick to another computer to use its SD card reader.
Assuming you are connecting the SD card to the server (via USB or internal SD card adapter), follow the guide below.
-
Insert SD card into SD card reader on Ubuntu server. If the computer has an internal SD card reader, use it. If not, a USB reader is recommended.
-
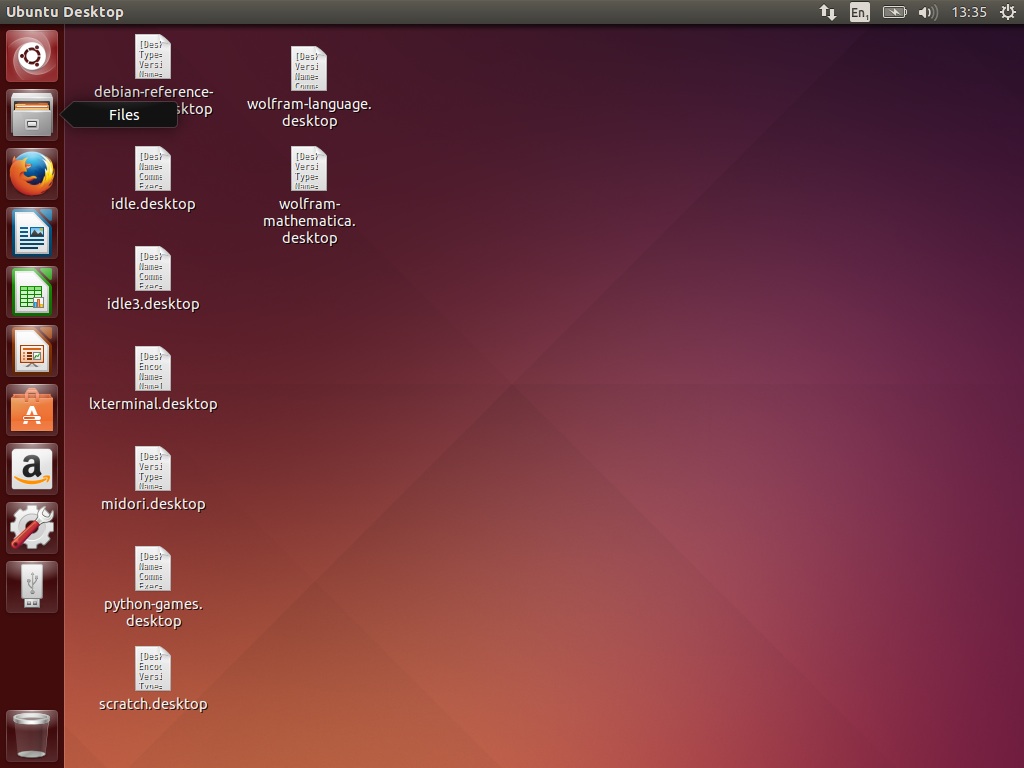
Open “Files” near top left.
-
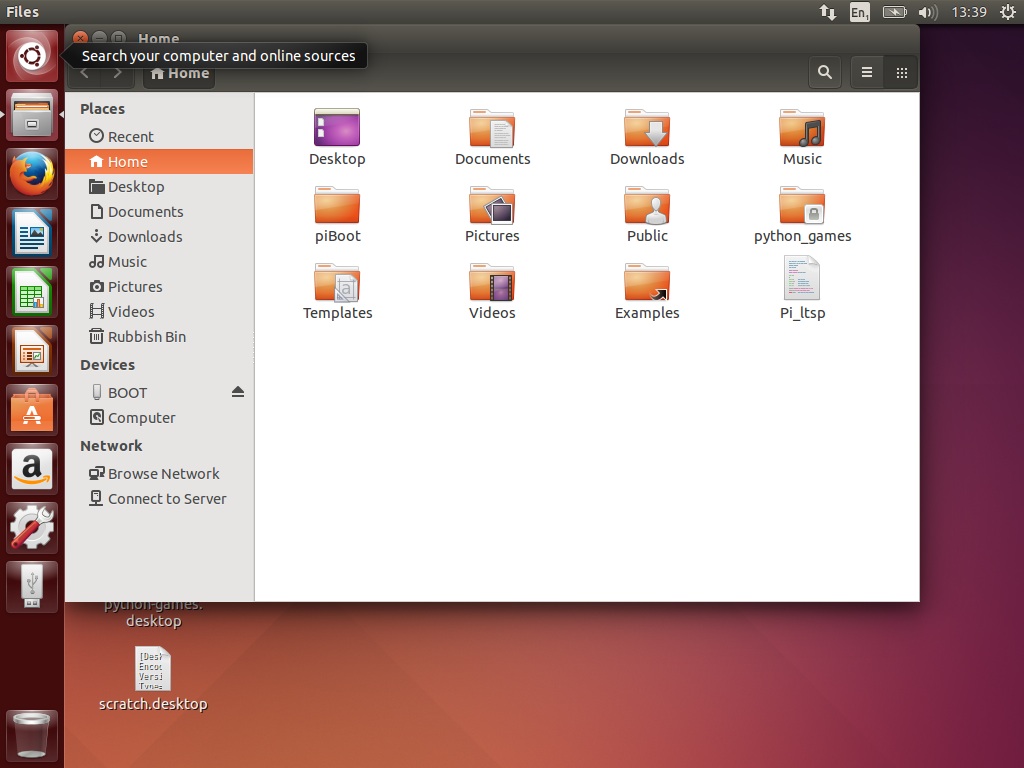
Piboot folder with the required boot files is stored in this folder.
-
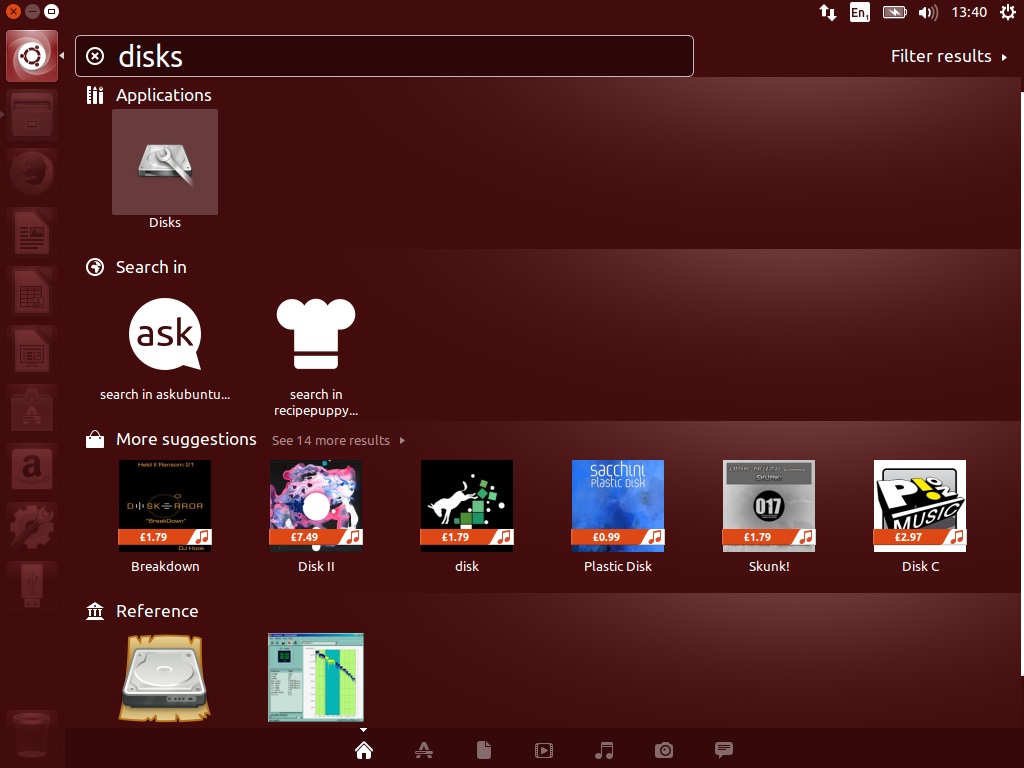
Open search again and search for “Disks”, Ubuntu’s disk manager.
-
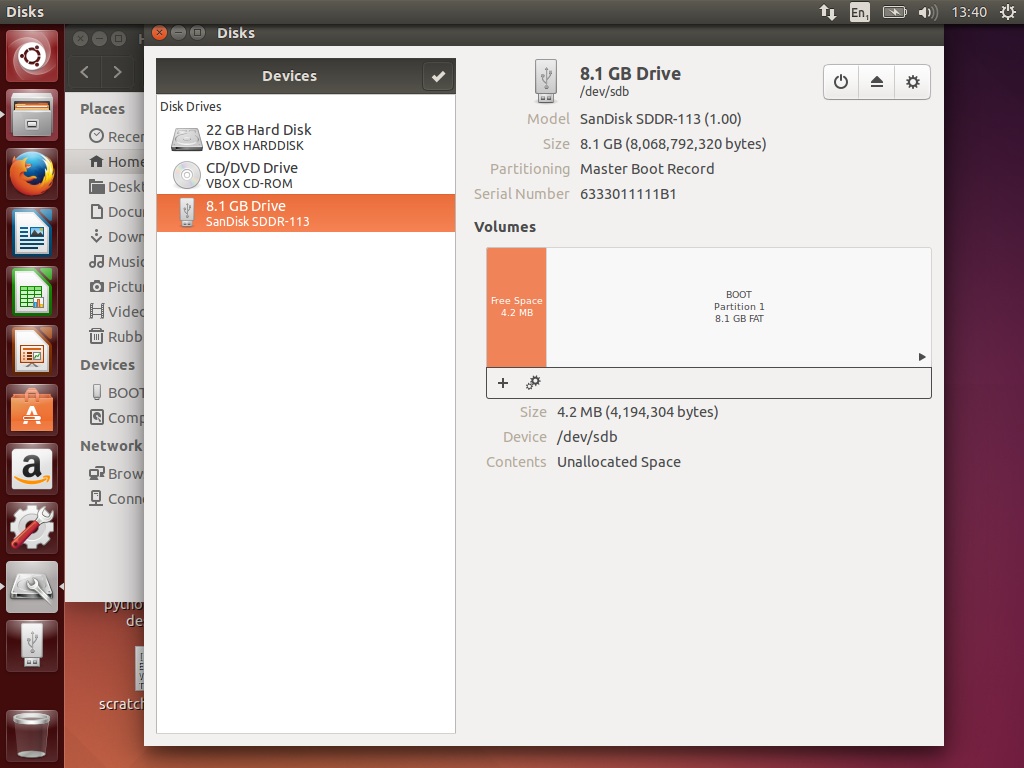
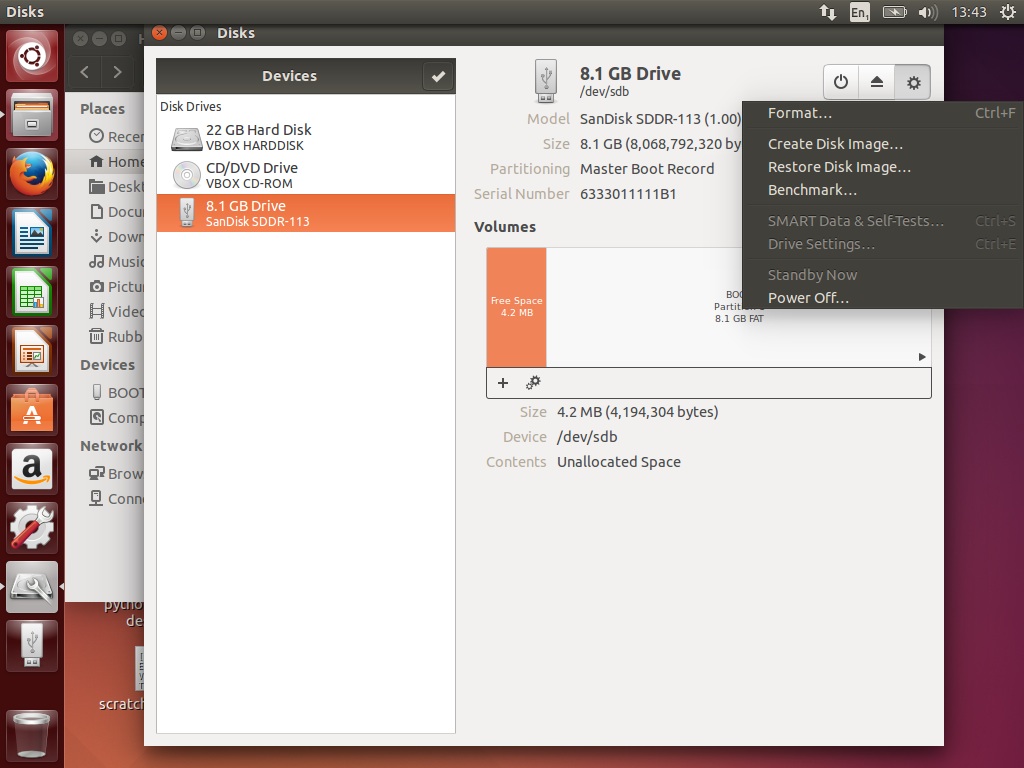
Select your SD card from the menu at the side. Be very careful to pick the correct device here! A good check is check the size, for example my SD card in the screenshot is an 8 gigabit SD card.
-
Select the cog in the top right and select format.
-
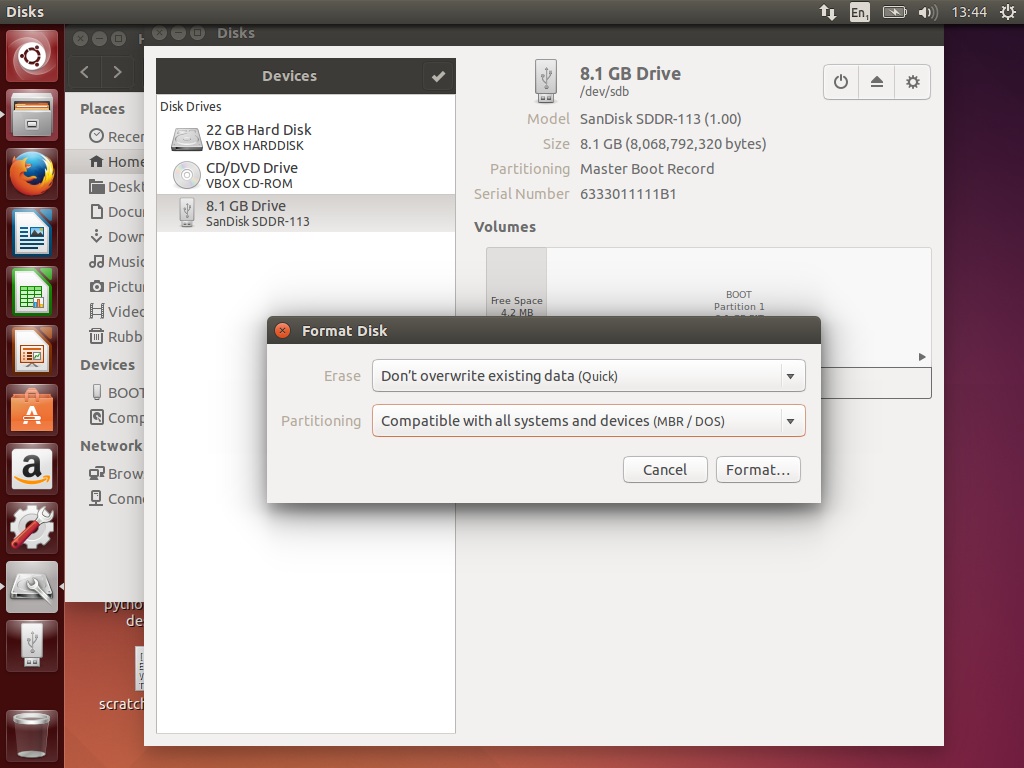
The default options should be correct in the format settings window. Select “Format…”.
-
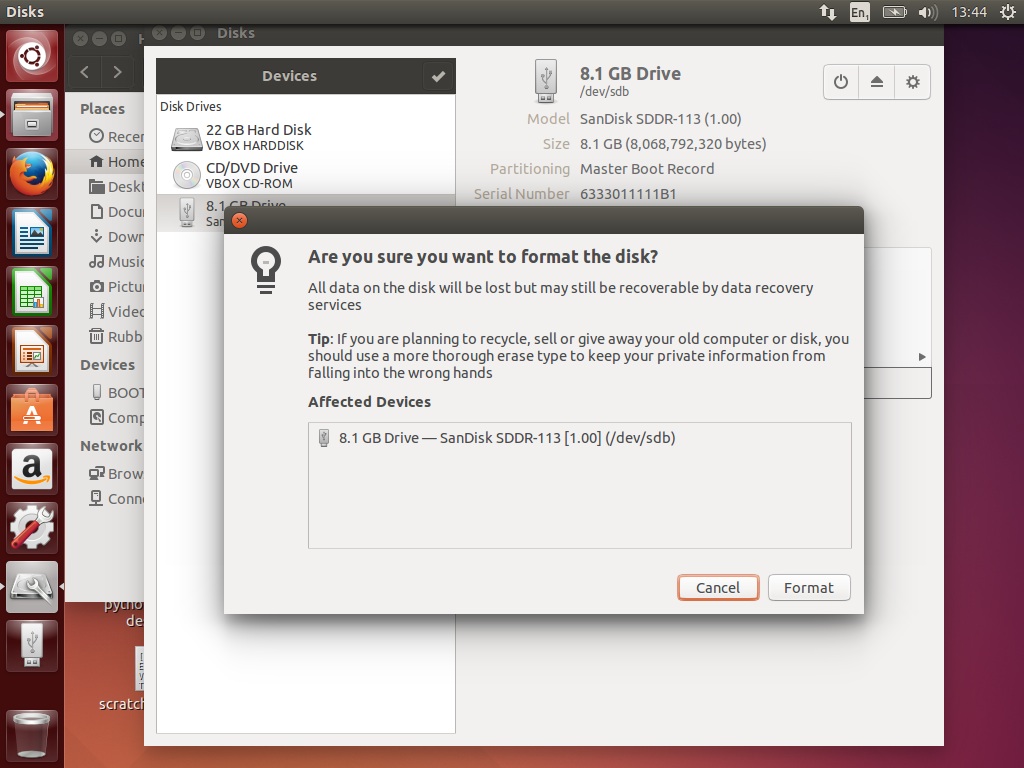
Check the device is correct and select format.
-
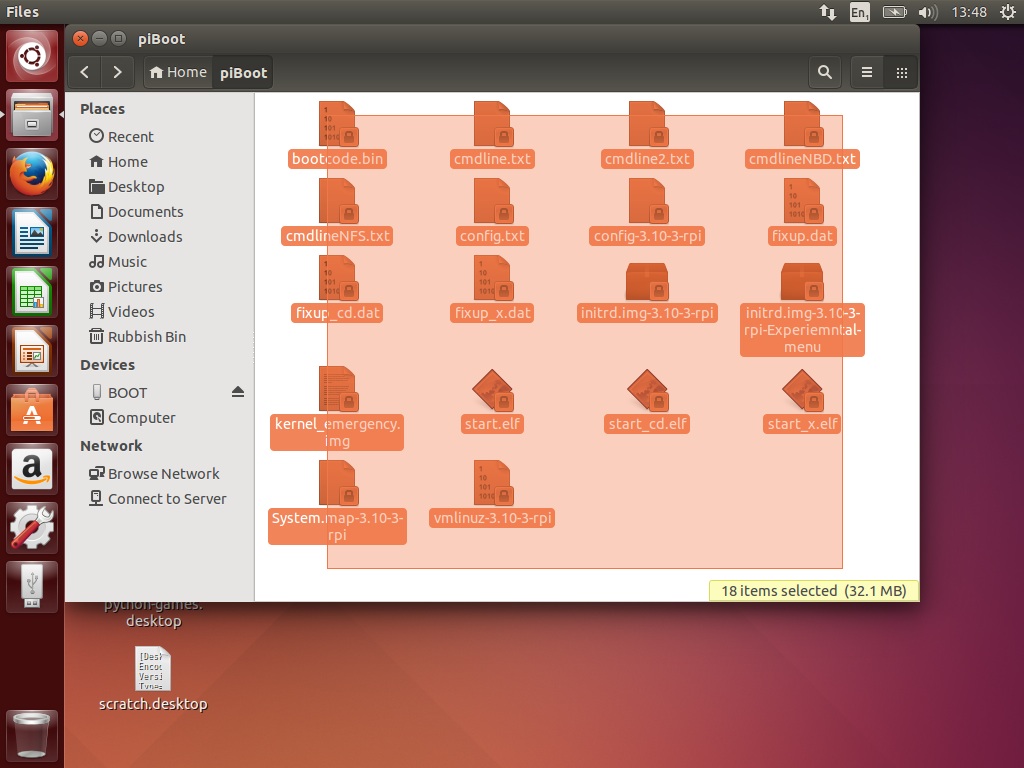
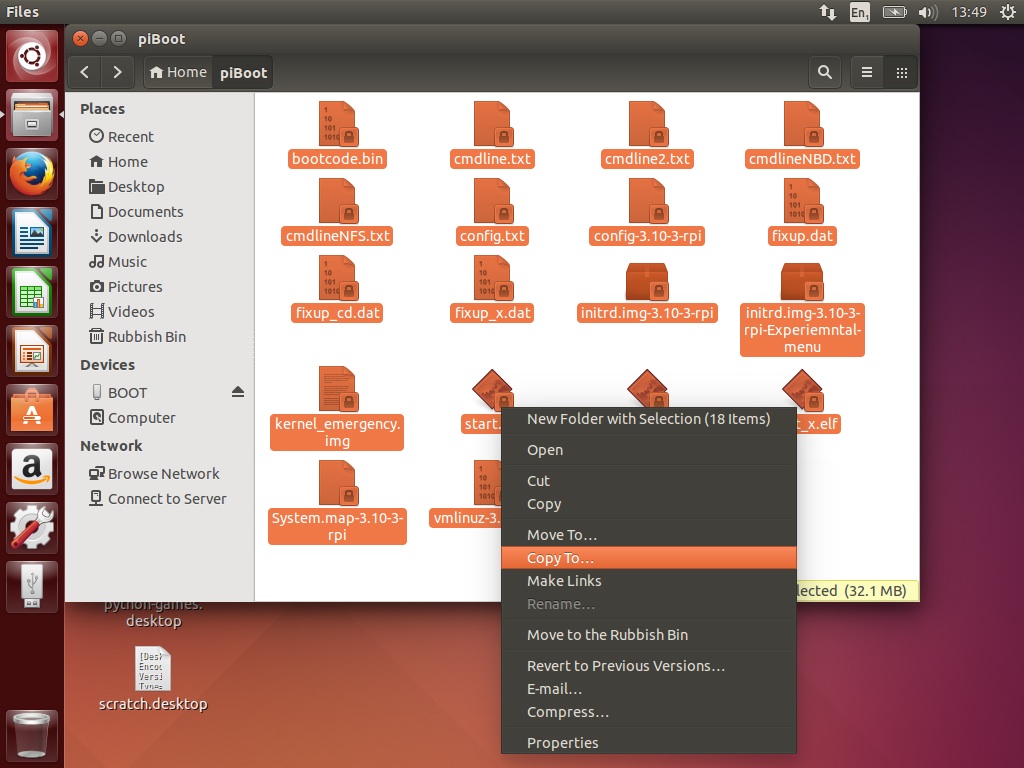
Open the piBoot folder and select all the files by dragging while holding left mouse button down.
-
Right click any file in the selection and select “Copy to”.
-
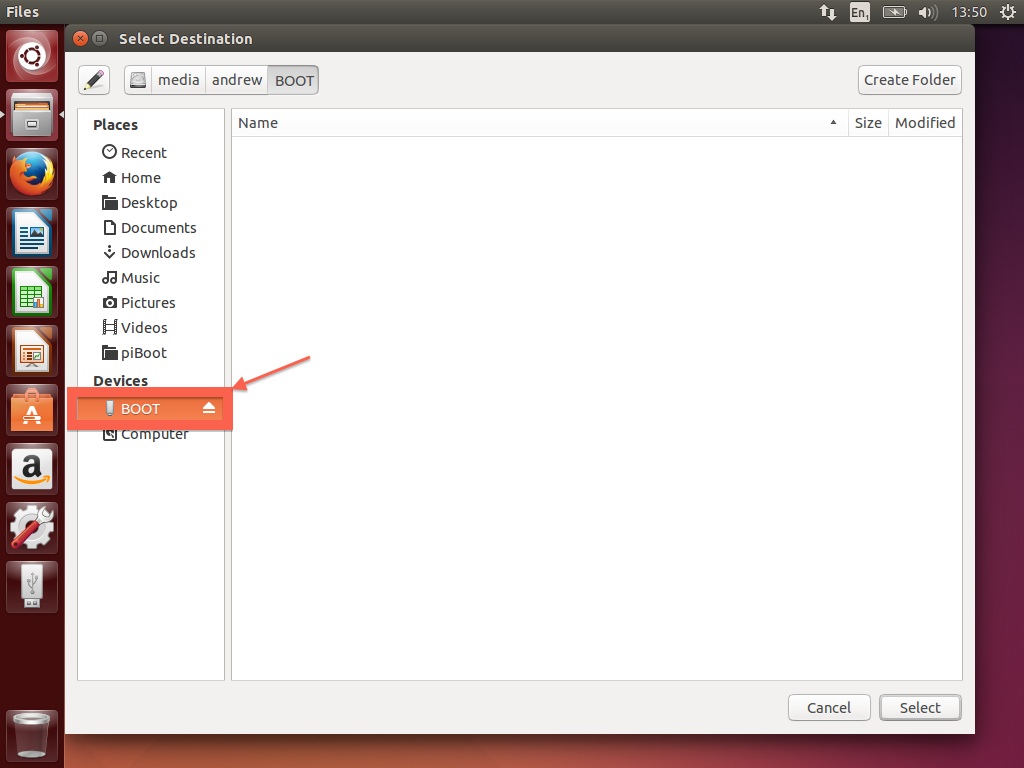
Select the SD card from the side bar. It is usually called BOOT but may be named anything. It should be completely empty. Then hit select.
-
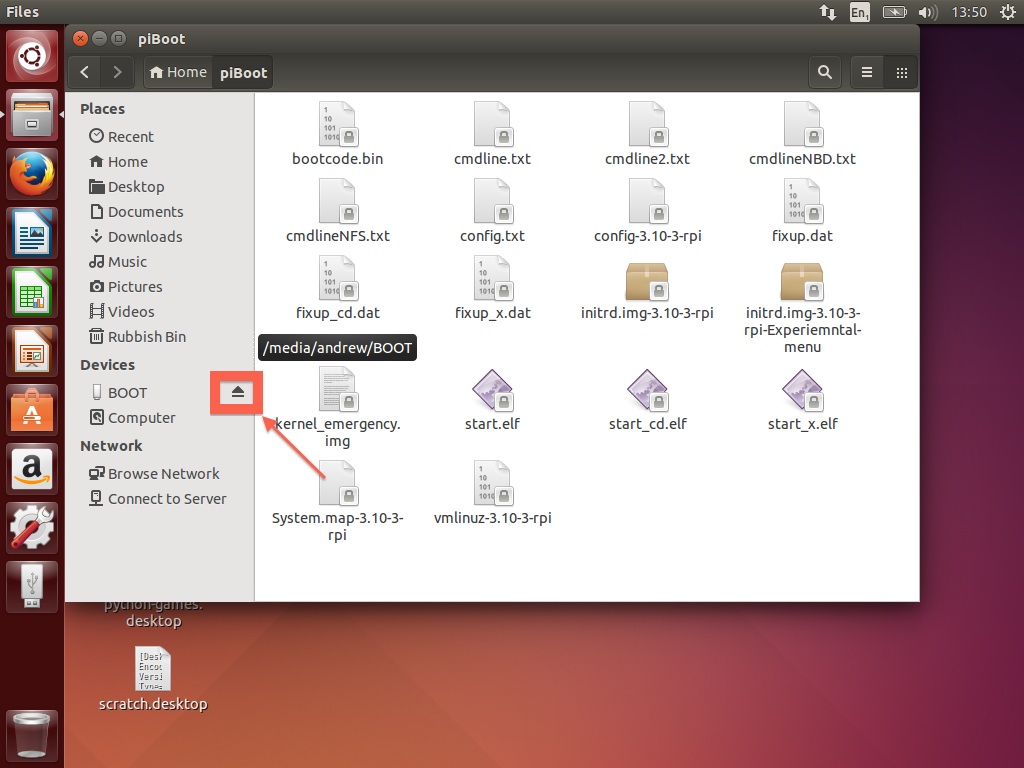
Finally hit the eject icon beside the SD card and remove it from the computer. Now insert it into a Raspberry Pi, plug the network cable in along with keyboard and mouse and plug in the power. The Raspberry Pi should then boot successfully. Don’t worry if you get an error complaining about the desktop environment, this is only a notice and not a problem. It only occurs with accounts that have logged directly onto the server.
If the Raspberry Pi fails to boot, check out the Support section.